What you need
Every method needs a design and a way to get its lines onto stencil paper, the special paper that carries a purple transfer layer. What else you need depends on how you transfer it:
- The design: a drawing, flash or reference photo turned into black line art.
- Stencil paper: thermal stencil paper for thermal printers, thermal copiers and hand tracing, or inkjet stencil paper for inkjet printers.
- A way to transfer the lines: a thermal printer, a thermal copier, an inkjet printer or a ballpoint pen.
- To apply it: green soap, a disposable razor, stencil transfer solution and paper towels.
Step 1: Pick and prepare the design
Start from a sharp, well-lit reference where the subject fills most of the frame. A blurry or dark photo gives you guesswork lines, and guesswork lines become guesswork on skin. If you work from a client’s photo, make sure they have the right to use it.
Decide early how much detail the stencil should carry. A stencil is a map, not the finished tattoo: it shows the outlines and the borders of the shading, and you build the rest with the machine. The smaller the piece, the fewer lines it can hold before they start to run together.
Step 2: Turn the design into line art
Stencil paper only picks up solid, dark lines, so a photo or a shaded drawing has to become black lines on white first. There are three ways to do it.
Trace it by hand
Print the reference, lay tracing paper on top (a light box helps) and trace the main contours with a fine black pen. Add the borders of the main shadows as thin lines instead of shading them in. This is free and gives you full control, but a detailed portrait can take an hour or more.
Draw over it in a drawing app
On an iPad or a computer, put the reference on a lower layer, draw your lines on a new layer above it in pure black, then hide the photo. Most artists who draw digitally already work this way, and it makes changes easy. Export the line layer alone as a PNG on a white background.
Convert the photo with a stencil maker
A tattoo stencil maker like StencilPilot does the tracing for you: upload the photo, pick a style and you get clean line art in seconds, ready to edit and print. The three styles cover most work:
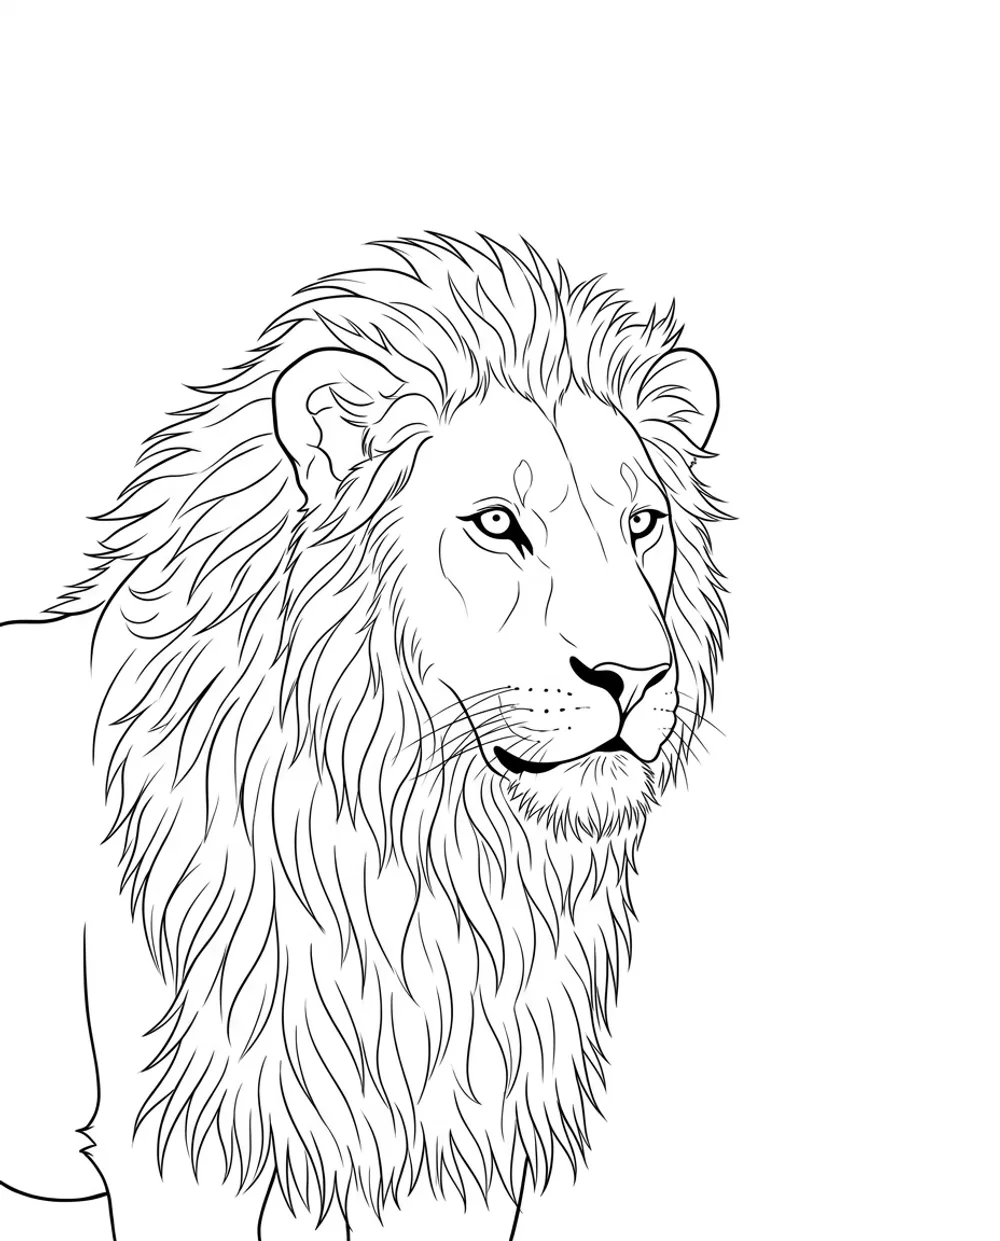
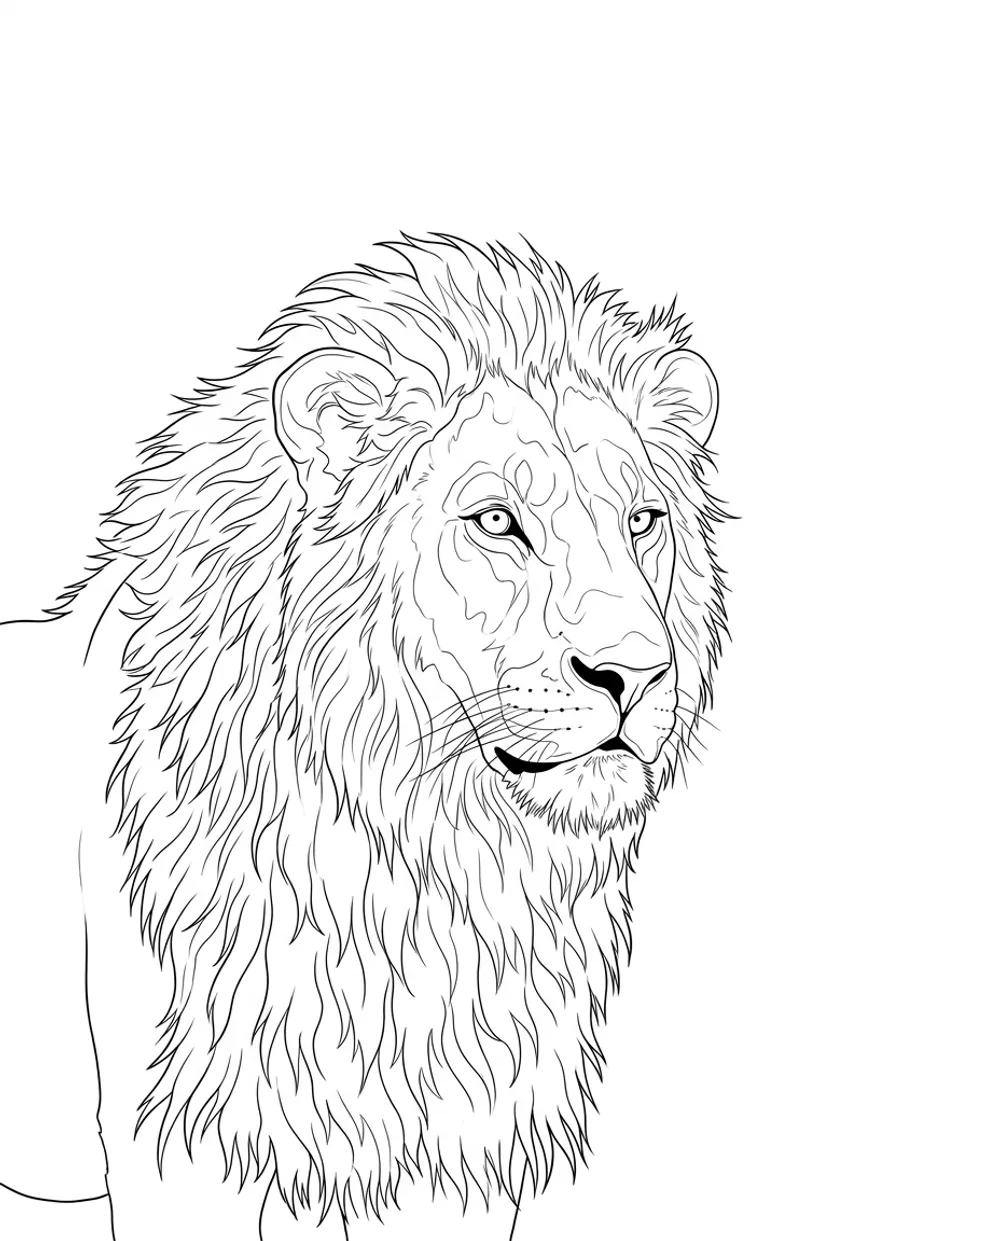
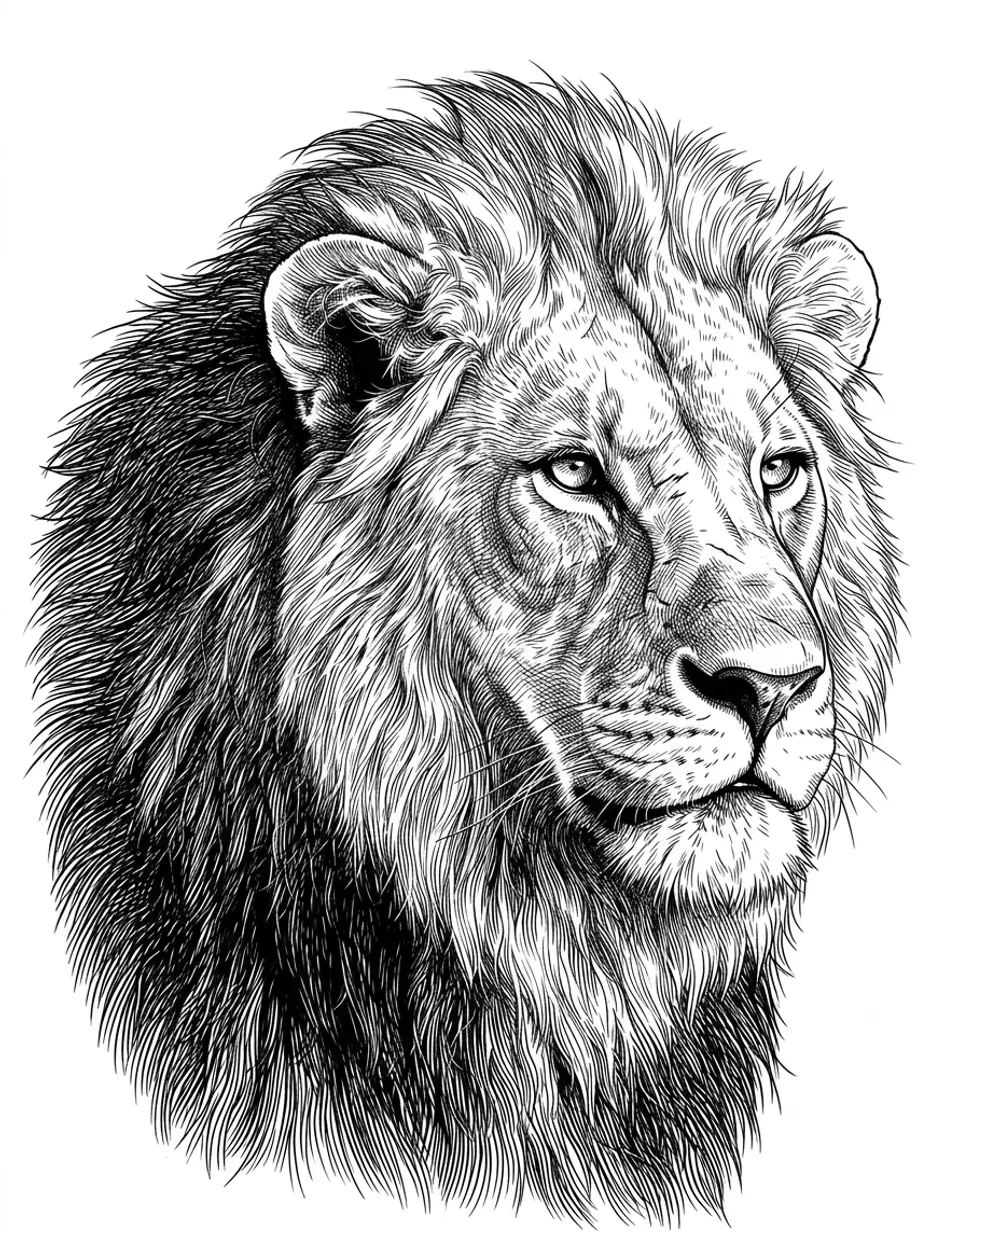
Whichever way you choose, the result should be pure black lines on a white background, with closed outlines and no gray areas.
Step 3: Clean up the lines
Before you print, check the line art the way the stencil paper will see it:
- Black and white only. Gray lines print faint or patchy on thermal paper. Push everything to pure black.
- Remove stray marks. Dots, specks, moles and dust become lines on skin. Erase anything that isn’t part of the design.
- Check the line weight. Very thin lines may not transfer; very thick ones blur. Lines should stay clearly separated, especially in dense hatching.
- Outline solid areas. A large solid black area (a pupil, a shadow) transfers as a messy blob. Mark its border instead and fill it in with the machine.
Step 4: Size it for the placement
Measure the placement on the body with a flexible tape and decide the final height or width. Then print the design at exactly that size: set the size in your app or in the print dialog, and always print at 100% (often called “Actual size”). “Fit to page” silently shrinks or stretches the design.
Measure a known length on the printout before you transfer it. StencilPilot prints a ruler on every page for this, and splits pieces bigger than one sheet across several A4 or Letter pages with alignment marks.
Step 5: Put the design on stencil paper
Thermal stencil paper usually comes as a set of sheets: a white top sheet, a thin tissue, a purple carbon sheet and a backing sheet. Heat or pressure moves the purple onto the back of the white sheet, and that sheet is what goes on the skin. Here are the four ways to get the design there:
Thermal stencil printer
You need: A thermal printer and thermal stencil paper. Print straight from your phone, tablet or computer.
Best for: Daily studio work: the fastest method with the most consistent lines.
Mirror the design: No
Thermal copier
You need: A thermal copier, thermal stencil paper and a dark print or drawing on plain paper.
Best for: Hand-drawn designs, or turning a regular printout into a stencil.
Mirror the design: No
Inkjet printer
You need: Any inkjet printer and inkjet stencil paper.
Best for: Getting started without buying thermal equipment.
Mirror the design: Usually yes
By hand
You need: Freehand transfer paper and a ballpoint pen.
Best for: Small, simple designs when no printer is around.
Mirror the design: No
With a thermal printer
Load thermal stencil paper as your printer’s manual shows and print the design from its app or from the PDF. Most thermal printers have a darkness or density setting: raise it if the lines come out light. This is how most studios print stencils today.
With a thermal copier
Print the design on plain paper, remove the tissue from the stencil paper and feed the printout through the copier between the white top sheet and the carbon sheet. Thermal copiers react to carbon, so laser prints, photocopies and pencil drawings work best. An inkjet print often comes out faint: photocopy it first.
With an inkjet printer
Inkjet stencil paper goes straight into a regular inkjet printer. Since the printed side goes face down on the skin, most papers need a mirrored print. Use your app’s mirror option or the printer’s “mirror image” setting, and let the ink dry before you apply it.
By hand
Remove the tissue from freehand transfer paper, lay your line art on top and trace it with a ballpoint pen, pressing firmly. The purple lines appear on the back of the white sheet. It works for small, simple pieces; detailed work is much easier to print.
Step 6: Apply the stencil to the skin
- Trim the stencil, leaving a small border around the design.
- Clean the area with green soap, shave it with a disposable razor and clean it again.
- Apply a thin, even layer of stencil transfer solution. Too much makes the lines run.
- Place the stencil purple side down, press it firmly and evenly for a few seconds without sliding it, then peel it off slowly from one edge.
- Let it dry for at least 10 to 15 minutes, and longer for big pieces.
- Check the placement with your client in a mirror. If it’s off, wipe it away with rubbing alcohol or a stencil remover and apply a new one.
Making a tattoo stencil at home or without transfer paper
You don’t need a studio to make a stencil. A home inkjet printer with inkjet stencil paper, or a pack of freehand transfer paper and a pen, covers it. You can also make the line art at home and print it wherever a thermal printer is available.
Without any transfer paper, the honest answer is that the alternatives are weak. Tracing paper with a pen, or regular printer paper pressed onto the skin, gives faint lines that wipe off quickly. Some artists skip the stencil entirely and draw the design straight onto the skin with a skin marker, but that takes practice. Stencil paper is inexpensive and gives far better results.
Common problems and fixes
- The stencil comes out faint or patchy
- The design has gray lines or the printer’s darkness setting is low. Convert the design to pure black on white, darken faint lines and raise the print darkness. On a thermal copier, use a laser print or a photocopy instead of an inkjet print.
- Lines merge into blobs on the skin
- Lines spread a little during transfer. Leave more space between them, thin the line weight, or use a lighter hatching. Leave out small dots and texture you will shade freehand anyway.
- The stencil smudges while you work
- It wasn’t dry yet, or there was too much transfer solution. Use a thin layer, wait longer before you start, and wipe the skin with gentle dabbing instead of rubbing.
- The size is wrong once printed
- The print dialog scaled the page. Print at 100% (“Actual size”, never “Fit to page”) and measure a known length on the printout before you transfer it.
- Lettering reads backwards on the skin
- The design was mirrored for a method that doesn’t need it, or not mirrored for inkjet stencil paper. Print a small test with a single letter first.
The fast way: a stencil from a photo
If tracing is what slows you down, let StencilPilot do steps 2 to 4 with its photo to stencil converter. Upload the reference, pick outline, shading or hatching, tidy the lines in the editor and print true to size on your thermal or inkjet printer. You can also export a 300 DPI PNG, an SVG or a print-ready PDF. See the plans and prices, or make your first stencil.
Frequently asked questions
Can I make a tattoo stencil without a thermal printer?
Yes. Print on inkjet stencil paper with a regular inkjet printer, run a laser print or pencil drawing through a thermal copier, or trace the design by hand onto freehand transfer paper with a ballpoint pen. A thermal printer is only the fastest option.
Can I use regular printer paper for a tattoo stencil?
Not on its own. Plain paper doesn't carry the purple transfer layer, so the lines won't move to the skin reliably. You can print the design on plain paper first and then copy it onto thermal stencil paper with a thermal copier, or trace it onto freehand transfer paper.
How do I make a tattoo stencil from a photo?
Trace the main contours of the photo into line art, either by hand on tracing paper, on a layer in a drawing app, or automatically with a stencil maker such as StencilPilot. Then clean up the lines, set the size and print the line art onto stencil paper.
Do I need to mirror the design before printing?
With thermal printers, thermal copiers and freehand transfer paper, no: the lines land on the back of the top sheet and come out the right way round on skin. Most inkjet stencil papers need a mirrored print, because the printed side goes face down on the skin. Check your paper’s instructions, especially for lettering.
How long should a tattoo stencil dry before tattooing?
Give it at least 10 to 15 minutes, and longer for big pieces or long sessions. A stencil that has fully dried smudges far less when you wipe the skin.
How do I get a tattoo stencil off the skin?
Wipe it gently with rubbing alcohol or a stencil remover on a paper towel. Don’t scrub hard: clean the area, let it dry and apply the new stencil.
What stencil style should I use for a realistic tattoo?
A shading-style stencil: clean outer contours plus thin lines that mark where the main shadows and highlights start. For blackwork or engraving looks, a hatching stencil maps the shading with parallel lines instead.